Environmental Strategies to Support Communication
This module will highlight important strategies to improve communication outcomes. These strategies can be implemented in a variety of classroom and school settings from the playground and cafeteria to a variety of classroom settings. Improving communication outcomes starts with creating supportive communication environments.
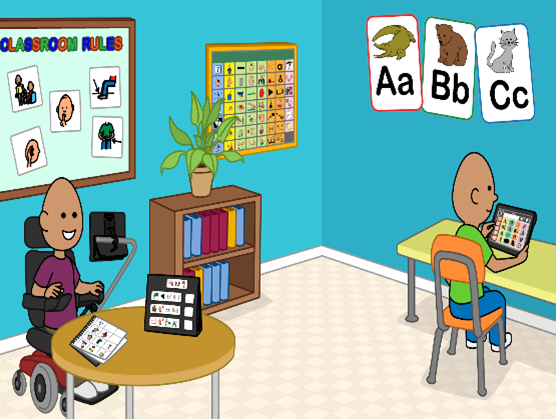
What makes a supportive communicative environment? – the answer is an environment that purposefully creates communication opportunities, provides a wide range of Augmentative Alternative Communication (AAC) options from low to high tech, and implements evidence-based teaching strategies, encouraging ALL students to USE AAC.
Review student records for recent hearing, vision, and motor accessibility challenges
- Hearing loss may present in unique ways, an impact communication and require the use of sound amplification devices – see this video on Hearing in the Classroom
- Watch a video for How FM devices work with hearing aids
- Ambient Noise is the most common problem in classrooms that can cause auditory processing problems or sensory coping behaviors. Students who use AAC may have difficulty hearing or the voice on their device may not be loud enough for others to hear. It is possible to measure the sound level in a classroom by using a management tool in the classroom. This tool could be projected to let student know the noise level in the classroom.
- Cortical visual impairments (CVI) may not show up in vision assessments, consult with a Teacher of the Visually Impaired (TVI) for CVI assessments as well as strategies for improving visual perception in the classroom. See this video for Vision in the Classroom.
- Watch this video to identify a hearing or vision loss see this video Behaviors that Indicate a Hearing or Vision loss
- Classroom lighting: It is also important to manage the classroom lighting as light sensitivity and glare on the device can limit access and for some students may even cause seizure activity to increase. It may help to use fluorescent light filters, or broad brimmed hat or baseball caps. See this Perkins School for the Blind video about the impact of visual clutter.
- Read about a Team approach to CVI
- Watch a video about motor considerations for AAC Accessibility
Schedule and commit to team communication
- Schedule regular team meetings for related service providers (e.g., PT, OT, TVI, SLP/AU)
- Use distance tools– invite parents as needed.
- Start the agenda with the cases involving the most service providers.
- Set-up a communication system among service providers
- Implement strategies for on-going communication
- Integrate services into natural environments whenever possible to share knowledge and Skills.
- See this Video for IT TAKES A TEAM
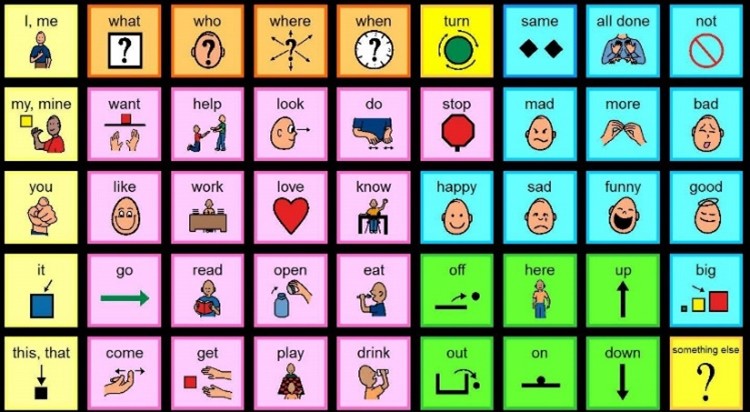
Using Speech-Generating Devices and Core Vocabulary
sing Low Core Vocabulary Folders, Core Vocabulary Word Walls, Projected Core Vocabulary, I-pads with core vocabulary applications provides more robust vocabulary for self-generated messages. Core Vocabulary
- This video highlights a variety of options for incorporating AAC in Circle time.
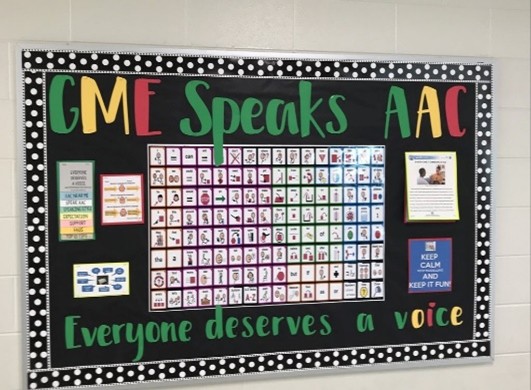
Locate communication low-tech pictures, core boards, switches across school environments – lunchroom, playground, gym, music/art classrooms. Encourage the use of these devices by encouraging EVERYONE to use them.
- Single message switch on the classroom door for greeting/goodbye.
- Core Vocabulary folders posted outside the classroom door.
- Core Vocabulary poster or Word Wall with pointer
- Core vocabulary folders on desks or tables
- Core Vocabulary projected on screen.
- Speech generating devices (SGD) located close to the user
- Use low-tech alternatives in ‘damage risk’ areas
- Multi-message switches in learning centers
- Multi-message switches available for group activities
Individual visual schedules provided in accessible format.
Teach all adults and peers to be good communication partners. Cultivate a relationship with the student.
Use Aided Language aQ– Slow speech and point to the symbols as you say them.
Use Partner assisted Scanning for beginning communicators.
Enhancing Communication Partner Skills; short 20-minute video.
The Listen UP! on-line course is 4.5 hours introduction for paras.
Supporting Communication for Transition-age Youth 1.0 hour.
PreK to 12 Peer Supports for Communication 2.0 hours
Communication Partner Checklist
Use Single and multi-message Switches
Locate switches with appropriate messages in the classroom environment where needed (e.g., entry, exit, bathroom, computer station, kitchen, play area, circle/group time, morning announcements, game table). Encourage all students not just non-speaking students to use the switches and alternative communication forms (e.g., pictures, sign-language, facial and body language). See a video for using switches.
Videos for Single and Muli-message Switches
These videos are created by The Step-Up AT to Promote Early Literacy Project (Step Up AT) is an innovative professional development resource to increase teacher and parent knowledge of evidenced based assistive technology (AT) practices to increase early literacy outcomes for preschool children with disabilities.
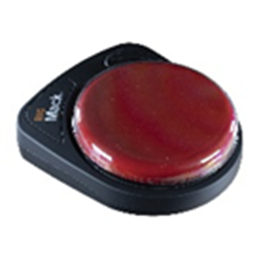
- This video highlights how to record messages on a Big Mac single message switch.
- This video highlights multi-message switches.
- This video highlights the many types of messages (e.g., requesting, commenting, refusing, giving information) that maybe communicated.
- This video focuses on using switch adapted toys.
Documents for Single and Multi- Message Switches
These documents provide ideas for using single and multi-message switches.
Create Communication Opportunities – these strategies are designed to help build a relationship with the student while ‘sneaking in’ some communication. Be sure WAIT Expectantly to encourage the conversation. It is not always about asking a question and getting an answer. A video below shows
- Creating Communication Opportunities through Core Word(s) of the week.
- Modeling Naturally through the Day 3 minute video.
Examples to Try
- Lose something – Model “Where’s my _____________”,
- Skip Something in the routine – “What Happened?”
- Provide wrong materials
- Skip a turn (make sure this is a different student every time and it is everyone’s job to make sure everyone gets a turn).
- Provide engaging games or activities – play alongside and comment
- “I like the yellow bricks”; or
- “I like your _________”;
- Ask advice “What should we do?”
- Watch a preferred video – Comment, compliment, ask a question.
- Tell jokes, riddles
- Play games
- Model during class activities – play games, play with words, play with science,
- Create scripts
Addressing Using Repeated word or phrase on the device or ‘stimming’ – Assistiveware Link
Teaching Peers About AAC – Peers have superpower in communication and social skills. Learn how to teach peers about AAC.
Stay Play Talk – Evidence-based Practice is a Peer Mediated Intervention to increase social interactions
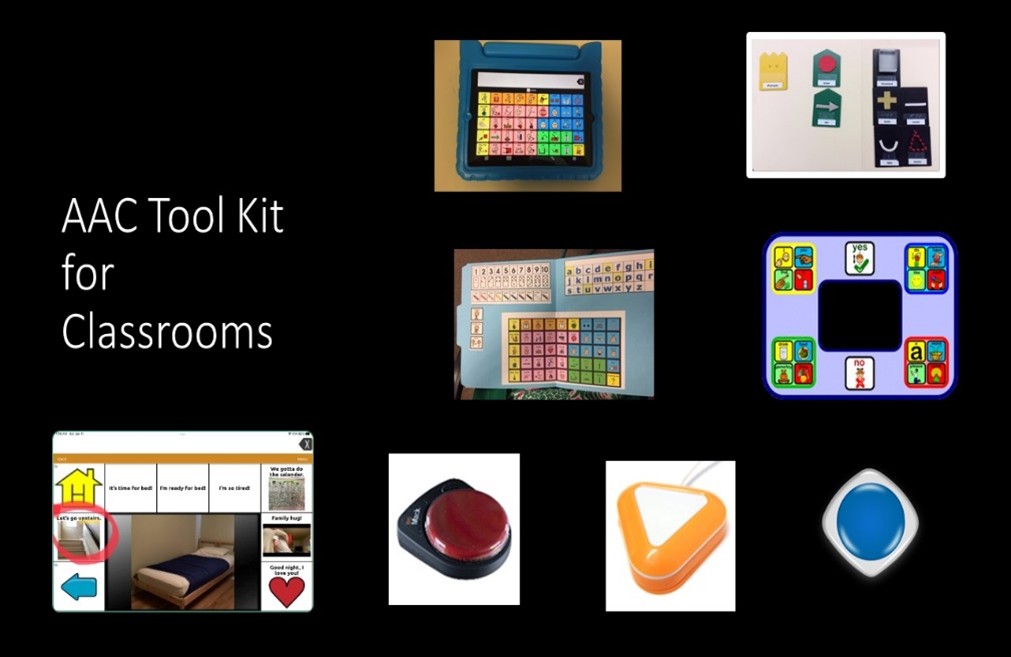
Tool Kit for Classrooms
Proximity switch for scanning (candy corn)
Classroom tablet(s)
- Symbol-based apps for try-out
Visual Scene Display apps
Core folders, lanyards
Tactile Symbols
E-tran (card holder)
Single Switches (Big Mac, Talking Brix, Go Talk One)
Attaching Switches in the Environment
Depending on the strength needed to attach switches and AAC aids, try suction tape, 3M Dual Lock, Industrial Velcro, and magnetic tape. Links highlighted below.
- Suction tape
- Industrial Velcro
- Magnetic tape
- 3M dual lock

A typical 18-month-old has been exposed to 4,380 hours of oral language in 8 hours since birth. A child with a communication system who receives 30 minutes of speech therapy 2X a week will take 84 YEARS to reach the same level of language exposure.
– Jane Korsten
Track modeling, AAC Use, Core Word Use
